Shotguncoach I have a really different question to ask you!! I have understood almost everything that you are doing!! I have watched in awe of the items you have brought back to life!! BUT the question and I will feel really greatful for your answer!! What exactly is the carding part of your process??
"Carding" is the process of removing the fluffy black oxidation from the metal surfaces after it has been converted from red rust (Fe
2O
3) to black rust (Fe
3O
4) in the hot water bath. I use a Grobet 4-row carding wheel on a Ryobi variable speed corded drill motor. Most people seem to prefer mounting the wheel in a drill press or stationary motor and then move the work around the tool....I prefer to mount the work in a vise and move the tool around the work. Stationary spinning tools and "loose" work can result in the work getting caught in the tool and being flung across the shop. I know how to do it so that the "fling zone" is away from me, but the result of the fling is that the flung object gets damaged. I really hope that someday "customer" becomes part of my vocabulary, so I'm teaching myself to work in ways that minimize the chances of damage to the work.
Carding can be done with the powered wheel, a hand brush, or with steel wool. The texture of steel wool gives me the heebie-jeebies so I prefer to work with the wheel and a hand brush. The difference between a normal wire wheel/brush and a carding wheel/brush is the diameter of the wires. My wheel has .0025" wires and my hand brush has .003" wires. The wheel is very soft...soft enough that you can stick your fingers into it while it is spinning and all it will do is polish your fingernails. My knife-maker friend lost his ever-loving mind the first time he saw me stick my hand into the wheel. He came running with a towel and a first aid kit expecting to find a hamburger hand. It was fun watching the war of emotions in his head go back and forth between "That's a neat tool" and "You're a <insert word that can't be used on this forum>!"
My process is as follows:
1 -- Make sure the firearm is unloaded
2 -- Perform an initial inspection, taking notes of damaged areas, missing pieces, and the overall condition. This includes measuring the trigger pull weights and the hammer tension. Lots of pictures are taken.
3 -- Make a plan. What do I want to get out of this project? In the beginning the plans were things like "I want to learn how to XXXX". I'm still doing that, but there is also a vision of what the finished piece should look like. For Project Rustbucket, the plan was in two parts: Try bluing using the 25% solution and the controlled rusting environment for the entire process, and bring the gun back as close to "improved original" as I can. To me, "improved original" means that it looks normal but the operating mechanism has a better-than-stock feel. Rustbuckets timing was good but the as-received trigger pull was very much like pulling a fork through a lasagna pan full of used cat litter. Some parts were smooth, some parts were crunchy, and overall it was not a pleasant experience.
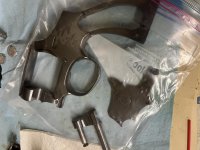
4 -- Completely disassemble the firearm and place all small parts that are not being blued or conserved into a labeled container. There is a decision point here: to me, conserving means that I am retaining the original finish and simply stopping the decay, while rebluing means getting rid of the existing finish and starting over. If it is a conservation project, skip steps 5, 8, 9, and 10.
5 -- Metal surface prep. At this stage of my learning I'm still doing the work by hand so that I completely understand just what is required to correct different issues, how much work each type of correction takes, and how long it takes. I'll eventually move up to powered tools but I feel like I need to understand it the slow way first. I'm still exploring The Riddle Of Steel.
")
6 -- Attach appropriately sized zip ties to each piece. I started out using baling wire, but several problems came up. The ends of the wire were scratching other pieces, the wire took up too much space in the boiling vessel, and the wire was rusting and adding contaminants to the water. Zip ties are cheap, flexible, non-marring, and they don't retain heat.
7 -- Completely degrease all of the parts to be worked on (and the zip ties) with non-chlorinated brake cleaner from your local auto parts store.
8 -- Mix the rusting solution. I use Brownells Classic Rust Blue and dilute it using 3 parts distilled water to 1 part rusting agent. I use 20ml glass screw top jars to hold the diluted mixture and 1ml glass graduated eyedroppers to measure. For Rustbucket and his silent companion I used approximately 16ml of diluted solution....4ml of rusting agent and 12ml of distilled water. The rusting agent comes in 4oz/59ml bottles and I'm still using the same bottle I started with a year ago.
9 -- Apply the rusting solution. I do this wearing latex exam gloves and with a clean sheet of white paper on the work surface. After step 7 the work is never touched with bare hands until after the oil bath. My applicators are 2" square cotton cleaning pads folded into quarters so I'm working with a 1" square that is 4 layers deep. A small amount of rusting solution is poured onto the pad and then wiped onto the metal pieces. I start with the yoke, then the sideplate, then the cylinder, then the frame/barrel comes last. The applicator is refolded between each piece so that a clean portion of the cloth is used every time. More solution is added for each piece and by the time the frame/barrel come up the cotton pad is saturated but not dripping. Apply the diluted solution in one direction and never touch the same area twice. I vary where I start on the pieces and the direction of the wipe with every cycle so that there are no areas that consistently receive the first wipe. Use a small amount of the solution. It should be completely dry and a visible scum forming within a few seconds of the application. The gloves, paper, and applicator pad are replaced with every cycle.
10 -- Hang and wait. The method I've found that works very well is to commandeer the guest bathroom for the rusting process. I use a steel rod (I think it's the extension piece to lower the rear tire on a truck I no longer own) set on top of the bathroom shelf so that the ends stick out. The weight of the rod is enough that I can hang a 4" K frame from one end and the rod will not tilt. The pieces are hung from the rod, the bathtub is filled with hot water, and the door is closed. This results in a warm, very humid environment. Each rusting cycle lasts two hours.
11 -- Boiling. I started out using stock pots on the side burner of my grill, but for the last few projects I've used a large deep fryer that has never had anything but water in it. The pieces are placed onto bamboo skewers that sit on the bottom of the fry basket to prevent metal to metal contact. When the distilled water in the deep fryer is at a rolling boil, lower the fry basket into the fryer, cover, and let boil for the appropriate time. When I'm conserving a gun and converting uncontrolled natural rust, I boil for 45 minutes. If it is rust that I applied in a controlled manner, the boil time is 20 minutes. At the end of the time, remove the fry basket from the water while it is still at a rolling boil...this will minimize the deposits from any scum that happens to be floating on top. Touching only the zip ties, move each piece from the fry basket to a heat resistant cutting board covered with paper towels, shaking the excess water from each piece as it comes out of the basket. Allow the pieces to rest (I watch too many cooking shows) until they are cool enough to touch. You can use dry compressed air to blow any remaining water off, but I've always found that the 212 degree steel dries itself quite well.
12 -- Carding (the part you've been waiting for LOL). Put on a new pair of white cotton gloves so that your fingers do not touch any part of the metal. Place each piece in turn into a padded vise using magnetic vise inserts
that are never used for anything else. Vise inserts are cheap...get a pair just for this. Do not clamp on the yoke barrel or you will collapse it - ask me how I know.

Practicing good trigger control, bring the speed of the drill motor to where you want it
before touching the wheel to the work. Use as little pressure as possible to remove the fluffy rust. Remember that you are polishing, not scrubbing. Always work so that the rotation of the wheel surface goes off the edges. You never want to work into an edge. Pretend that you're waxing a razor blade with your fingers. If you start in the middle and work towards the edge, your fingers will stay intact. If you start in the air and go to towards the edge, you'll have a mess and no fingers. You'll reposition your work in the vise several times and move the wheel quite a bit. Don't let the wheel just sit in one spot. The hand brush is used for inside the trigger guard, inside the cylinder window, inside the frame, and to clean out any serrations or checkered areas. It looks like a wire toothbrush.
(...by the way, did you know that the toothbrush was invented in Kentucky? If it was invented anywhere else it would be called a
teethbrush.) Make sure that you never use your carding brush to clean dirty guns. It's for carding and nothing else. I replace the gloves for each project. Store them in a place where they won't get dirty or wet during the rusting/boiling processes.
13 -- If you're doing a complete reblue, repeat 9, 10, 11, and 12 anywhere from 8 to 12 times. You'll know when to stop when the surfaces stop rusting after applying the solution. For a conservation project, proceed to the next step.
14 -- Oil bath. At this point there is absolutely no oil in the finish and there needs to be some. A 24 to 48 hour soak in an oil bath in necessary to seal the finish, displace any remaining water that is hiding inside the front locking lug area, and complete the process by stopping the rust reaction. Some people use kerosene, others use WD40, I use RIG #2 aerosol lube. I put the pieces into plastic ziploc bags, hose them down well with the lube, seal the bags and let them sit, turning everything a few times to redistribute the oil. If you decide to completely submerge the pieces in a bucket of kerosene, please do it outside......or send me your address so I can recover your guns after the fire.

15 -- Wipe down and reassemble, performing any action work that you want at this time. Take more pictures, pour yourself a beverage of your choice, and celebrate.
That may be a bit more than you were looking for, but there it is. I hope it helps. I'm sure I missed something in all that. 2152hq is a past master of this process and he may pop in to add some tips....he's been extremely helpful and has provided excellent advice as I've been learning.
Also, here's a video from Mark Novak that demonstrates the conservation process. Skip to the 39:00 mark to get straight to the discussion of carding wheels. In the video he's doing a conservation and not a reblue, and his methods are a bit different than what I described above. Everyone finds their own way....
[ame="https://www.youtube.com/watch?v=rShG_F85W1Y"]Conservation 101: Stop the decay![/ame]